Step 1 - Track Naming
Before sending any files, make sure they’re named, and that their name represents what’s on the track. Below are examples of good and bad track names:
Good
Bad
THE WORST/UGLY
Step 2 - Consolidating Tracks
Most recording software (Digital Audio Workstation or DAW) has made it easy to consolidate tracks to send off for mixing.
Consolidating tracks means that you’re making sure every audio file you send to your mix engineer has the same starting point. It’s important because once you send the files, and the engineer imports the files, you can be confident that the timing of each track has been saved.
Check out the pics below for examples.

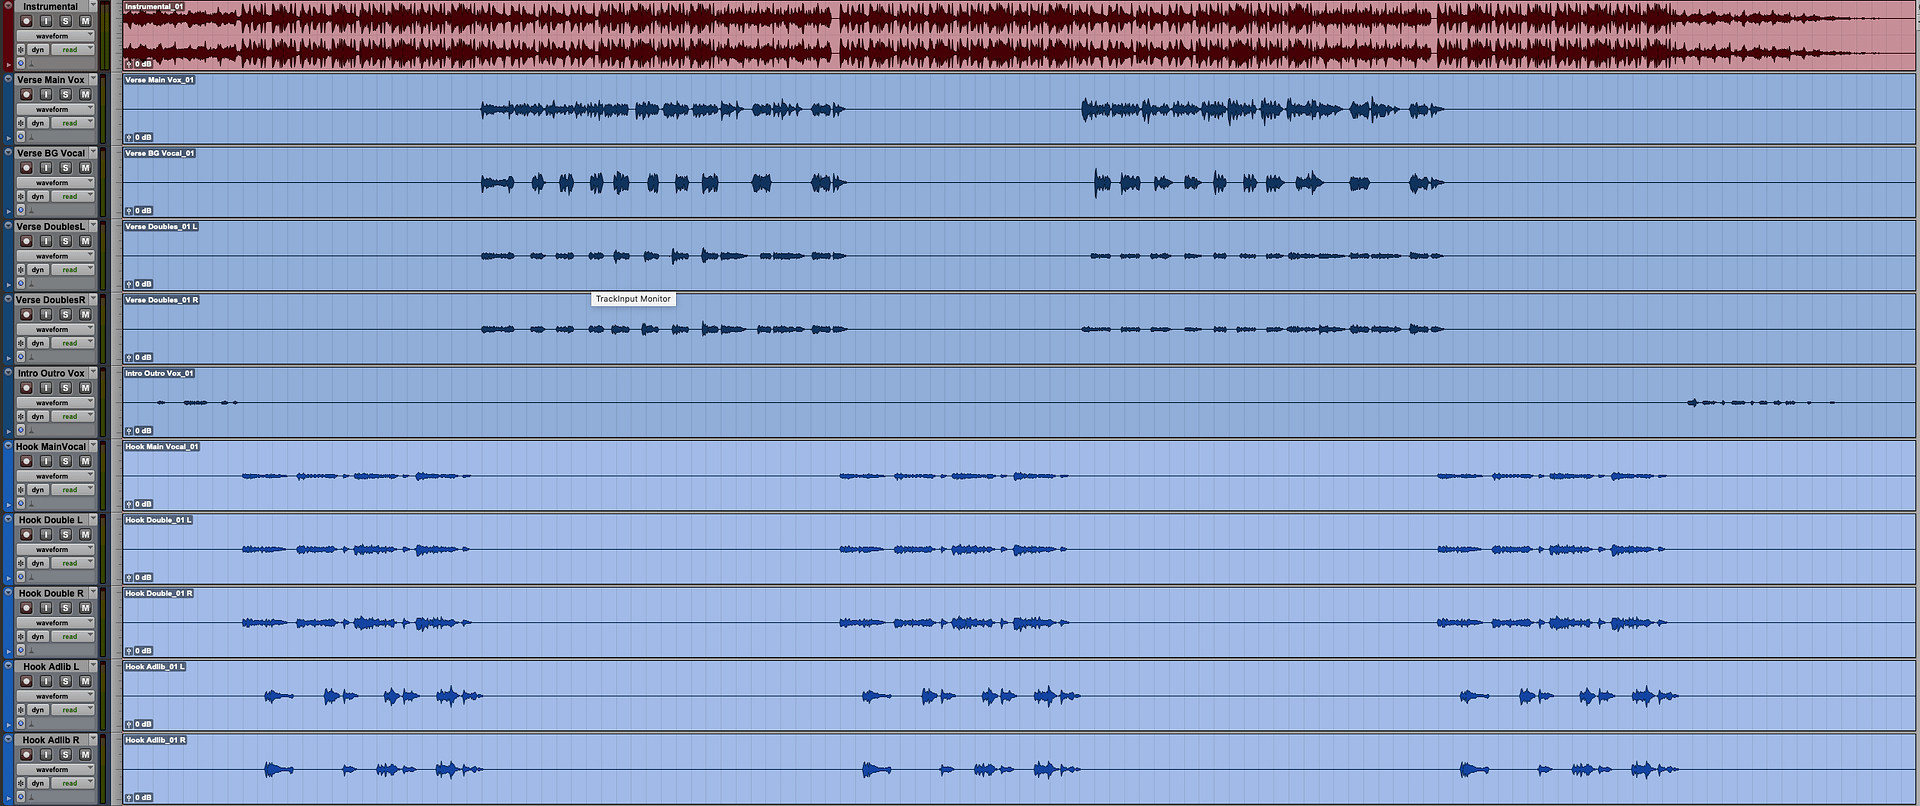
Properly Consolidated

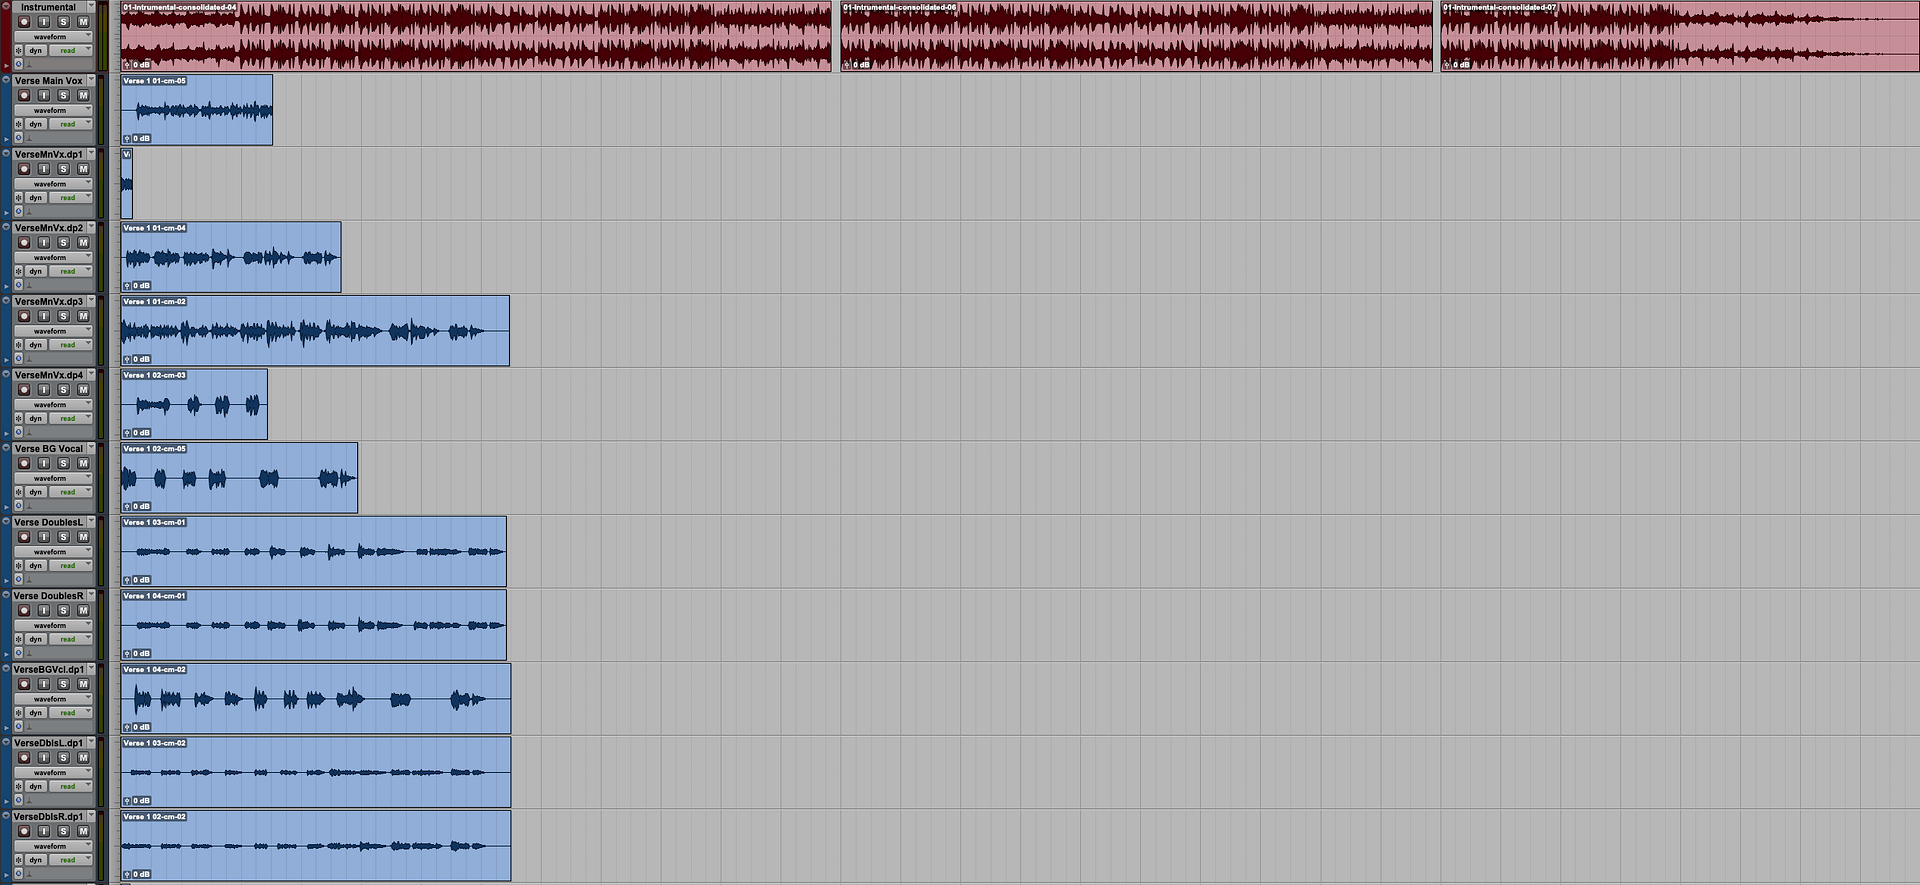
Not like this. This is wrong and will sound terrible.
Step 3 - Exporting Your Tracks From Your DAW
Before you export your tracks, make sure you’ve taken care of steps 1 & 2 first.
Now that you’re ready to export your tracks, make sure you know where you’re exporting them.
One method would be to create a folder on your desktop with the name “My Song - Export”. Then, in your DAW, export your tracks to the folder you just created.
After exporting your tracks, zip or compress the folder (in this case, the folder is called “My Song - Export”) so that nothing gets lost when you send it.

You can zip a folder by right-clicking on the folder and selecting "Compress..."
Step 4 - You're Done!!!
Then wait. Or go grab coffee. Or celebrate…because you’ve done your part!